

Requeening is a crucial practice in beekeeping to sustain the health and productivity of a colony. This process involves how to replace queen by substituting the queen bee with a new one to ensure the colony’s vitality. By following the optimal timing and methods outlined in this guide, beekeepers can achieve a success rate of approximately 85%. Remember, the queen integrates with her loyal bees during requeening, enhancing the overall functionality of the hive. With practical tips provided here, beekeepers can navigate the requeening process with confidence and efficiency.
Table of Contents
Why Replace a Queen Bee?
Understanding how to replace queen is essential for maintaining a healthy and productive hive. Requeening can address issues such as declining egg production, aggressive colony behavior, or the introduction of desirable genetic traits. A timely replacement ensures the colony remains robust and efficient.
Requeening can dramatically improve the performance of your hive. Here are the most common reasons:
- Declining performance: Queens over 2 years old often show reduced egg-laying capacity.
- Aggression: Replacing queens from aggressive lines with gentle strains can calm a hive.
- Disease or damage: Injured or virus-infected queens can compromise colony health.
- Improved genetics: Introducing queens with traits like hygienic behavior or mite resistance helps long-term productivity.
Using proper techniques ensures successful queen replacement and avoids setbacks.
When Is the Best Time to Requeen?
The ideal time to replace a queen bee is during a small nectar flow, when the colony is generally calm, well-fed, and conditions are favorable for queen acceptance. Requeening during a nectar dearth should be avoided, as the lack of forage often increases the risk of robbing behavior from neighboring colonies, which can disrupt the process and endanger the new queen. Mild weather and abundant natural resources significantly improve success rates during queen introduction.
That said, many beekeepers find the main nectar flow the most practical period to requeen, though it comes with its own challenges—namely the physical strain of lifting heavy honey supers, which can make queen replacement more difficult. A surprisingly effective alternative is early spring, specifically at the very start of pollen availability. During this time, colonies tend to accept new queens very well, even without the use of a queen cage.
How to Replace Queen Using a Nucleus Hive?
Creating a nucleus colony (nuc) is one of the most reliable ways to introduce a new queen with minimal rejection.
Step-by-Step Instructions How to introduce QUEEN to Nucelus Hive
- Select 2–3 frames of brood from a strong colony and place them in a 6-frame nuc.
If using a 10-frame hive, use 4–6 brood frames. - Add 1–2 frames of feed or honey to support the new colony.
- Insert the new queen in a cage with a candy plug. You can use a toothpick to make a small hole in the candy plug to help a small colony open the queen cage more quickly, allowing the queen to be released sooner. However, this method is not recommended when replacing the queen in a large colony—especially one that spans more than three hive bodies. In such cases, it’s better to delay the release, for example by placing painter’s tape over the candy plug. This slows down the outside bees from chewing through the candy too quickly.
- Leave the nuc in the same yard as the original hive. Forager bees will return to the original hive, leaving young nurse bees and emerging brood—more likely to accept a new queen.
- After 2–3 days, check if the queen has been released from her cage.
✅ Success rate: ~95%, due to the absence of older, more defensive bees in the new colony.
Requeening a Parent Hive After Building a Nuc
If your goal is to eventually requeen the original (parent) hive with the new queen:
- Wait 3–4 weeks until the nuc is full, and the queen is laying consistently.
- Kill the old queen in the original hive.
- Move the entire nuc (frames, bees, queen, and brood) into the old hive.
The new queen is protected by her own colony, increasing the chance of acceptance.
✅ Success rate: ~85%, as the queen enters with her loyal bees.
Recommended Video: How to Replace a Queen Bee
If you’re a visual learner, we recommend watching Randy Oliver’s video on how to replace a queen. While the method shown differs slightly from the one described here, the video still provides a helpful visual overview of how queen replacement is generally carried out—including key steps, timing, and what to look for during the process.
👉 Watch on YouTube: How to Replace a Queen – by Randy Oliver
Common Mistakes and Tips
❌ Don’t introduce a new queen immediately after removing the old one. Wait 24 hours.
❌ Don’t requeen during drought or heavy robbing season.
✅ Always provide food frames during setup.
✅ Limit inspections during the first week to reduce colony stress.
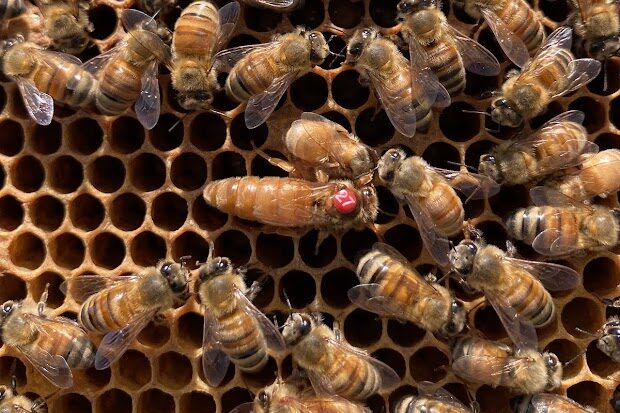
✅ Label and track queens by year, using colored queen markers.
Conclusion
Knowing how to replace queen bees effectively gives beekeepers powerful control over their hive’s genetics, temperament, and productivity. The nucleus hive method is not only beginner-friendly but also offers industry-leading success rates. Whether you’re working with Italian, Carniolan, or Buckfast queens, applying these strategies can result in smoother requeening and healthier hives.
Leave a Reply